Presenting your ideas in informative and visually appealing ways is always important. By learning how to make a shape transparent, you can add depth and contrast to your slides, making them more engaging and memorable.
Whether you’re creating a business proposal, a school project, or a personal presentation, the ability to make a shape see-through in Google Slides will definitely enhance your presentations.
In this article, we will provide you with a step-by-step guide on how to make a shape transparent in Google Slides, as well as update images and text. Keep reading to make your presentations stand out!
Table of Contents
Why Should You Make a Shape Transparent in Google Slides?
Creating an opaque or transparent shape in Google Slides can improve the design and visual impact of your presentation. By reducing the opacity of a shape, you can highlight and draw attention to the content behind it. This is especially useful when you have a busy background or multiple elements on a slide.
Adjusting the transparency of shapes can also create aesthetically interesting effects, such as layering different shapes with varying levels of transparency to produce unique visual effects. Adjusting the transparency of shapes can create overlays that add context or additional information to an image or graphic, such as adding a transparent shape with text on top of an image to provide a caption or explanation.
How to Make a Transparent Shape in Google Slides
To change the opacity of shapes in Google Slides, open the presentation you want to edit.
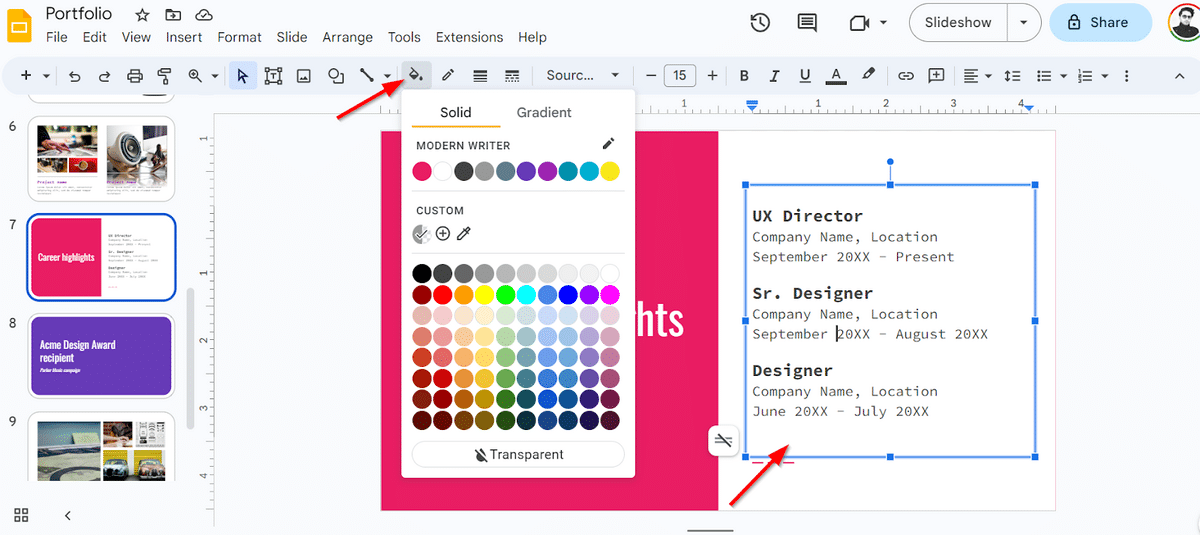
- Click on the shape you want to alter the transparency by clicking on it. From the toolbar, click on the paint bucket icon to open “color fill options.”
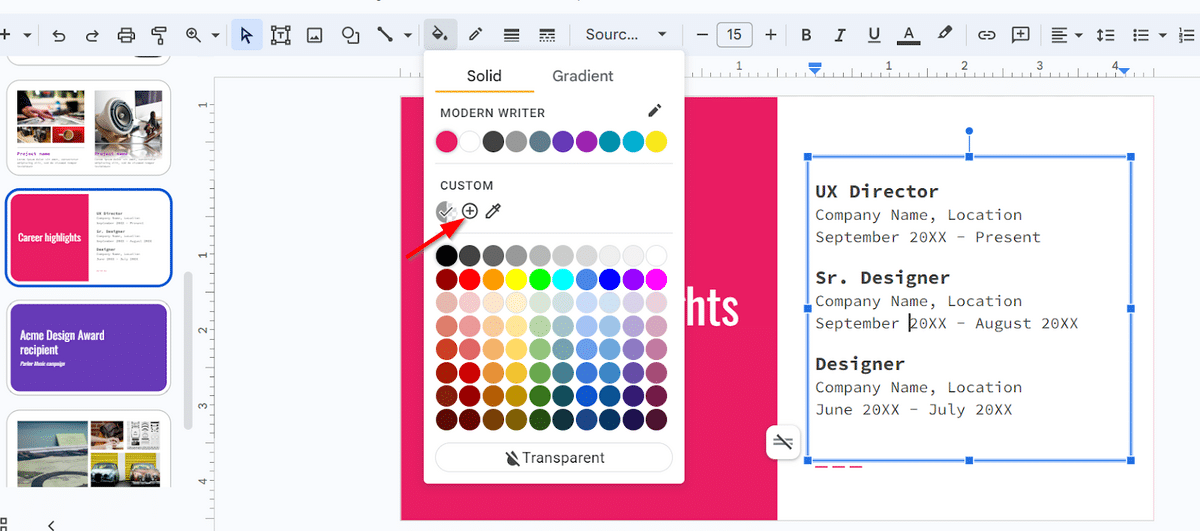
- Click on the “plus (+)” from the “Custom” tab.
- Use the slider from the new window to adjust transparency. By shifting the slider to the left, you can increase the transparency of the shape (and vice-versa).
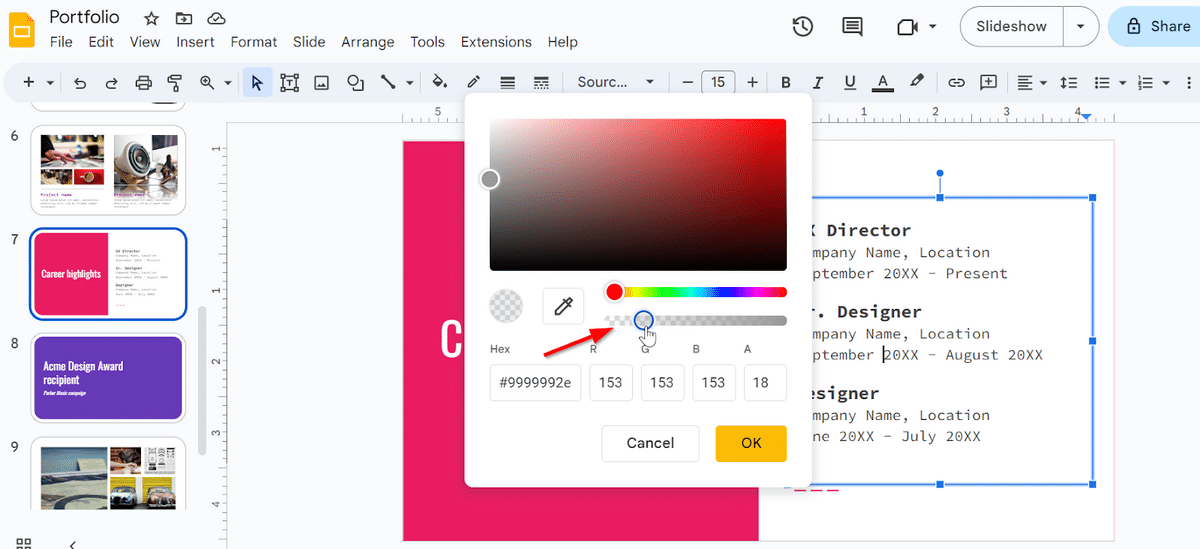
You’ve now successfully changed the opacity of a shape in Google Slides!

How to Change the Transparency of an Image in Google Slides
As opposed to shapes, you cannot change the transparency of an image using the fill color option. Instead, you have to select format options to be able to change the opacity of an image. Here’s how you can change the transparency of an image in Google Slides:
- In your Slides presentation, click on the specific image you want to adjust, then click on the “Format options” button.
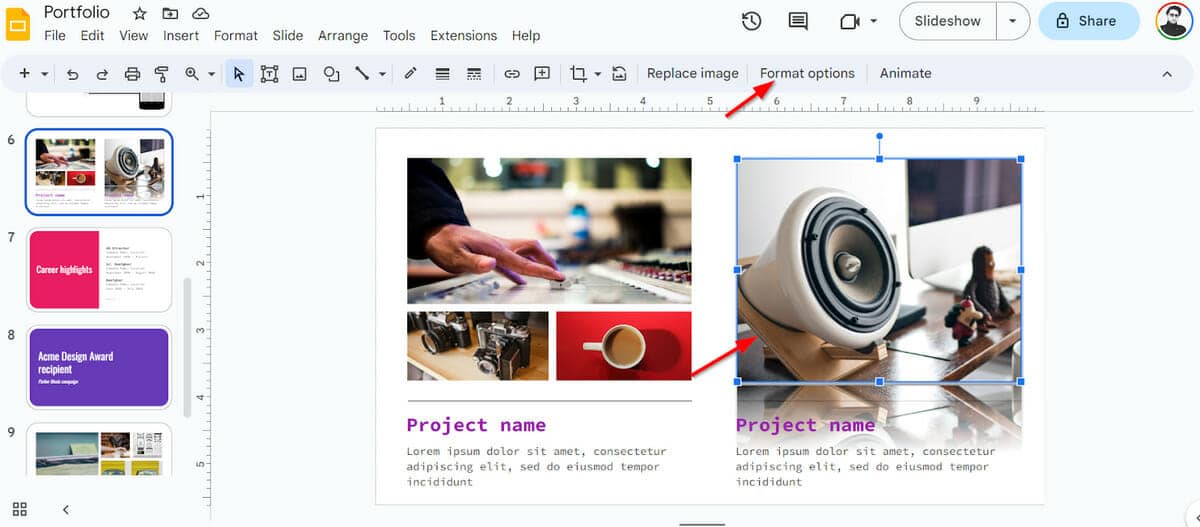
- Use the slider in the “Adjustments” tab to edit the appearance of your image. Moving the “opacity” slider to the left will make the image more transparent. Once you’re content with the level of transparency, click on the “Apply” button.
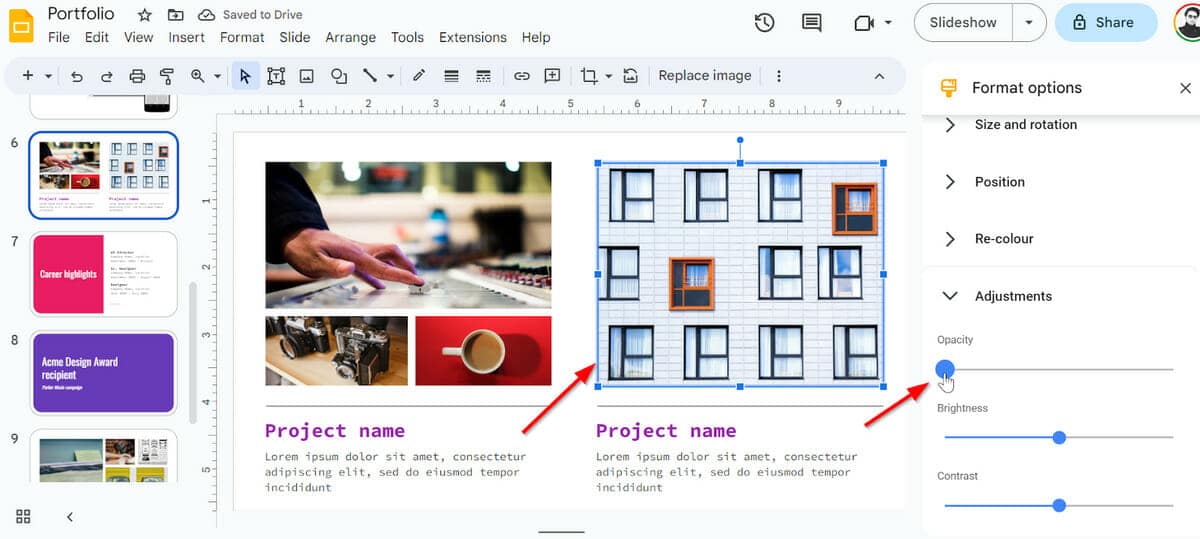
That’s all! You’ve successfully altered your image’s transparency in Google Slides.
How to Change the Transparency of Text in Google Slides
Changing text transparency is the same as changing the transparency of a shape. Follow the steps listed below to easily change the transparency of text in Google Slides:
- From the toolbar, click on “Insert” and “WordArt.”
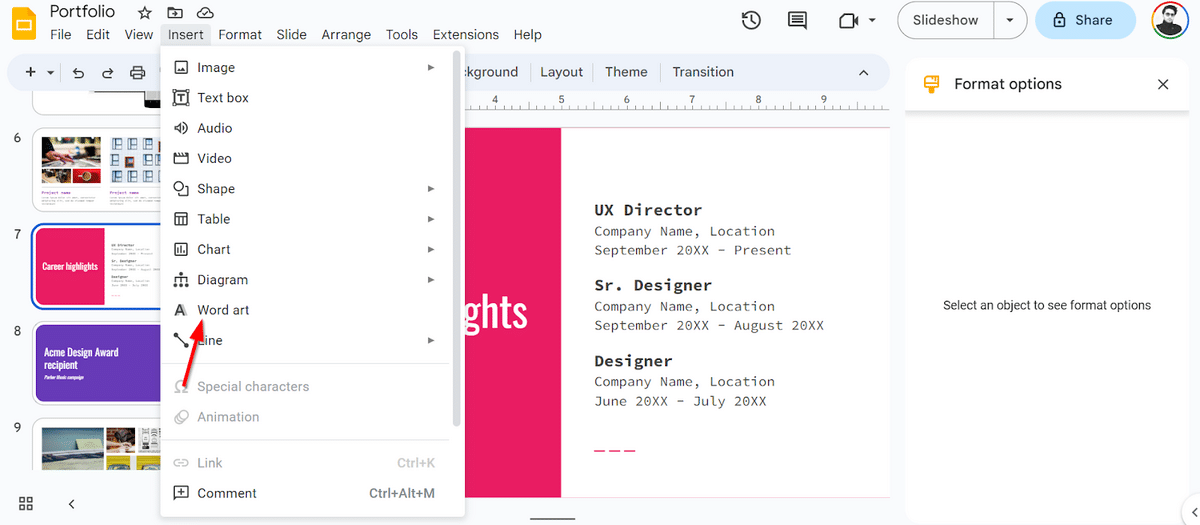
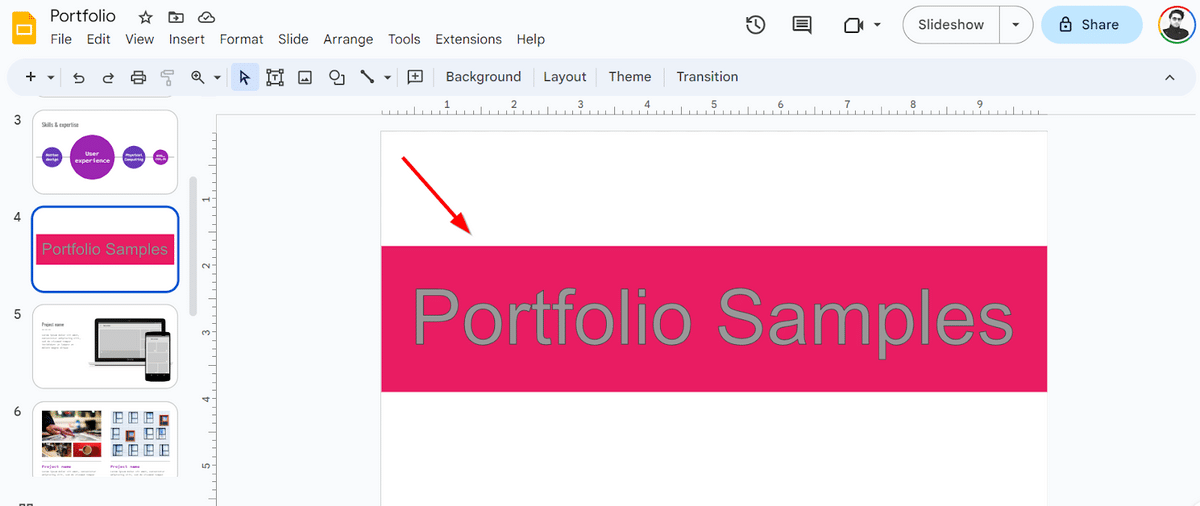
- Type in the text you want to use.
- To make the text transparent, select the text and click on the “Paint bucket” icon to pull up the transparency setting. Then, move the “transparency” slider to the left to choose your desired selection.
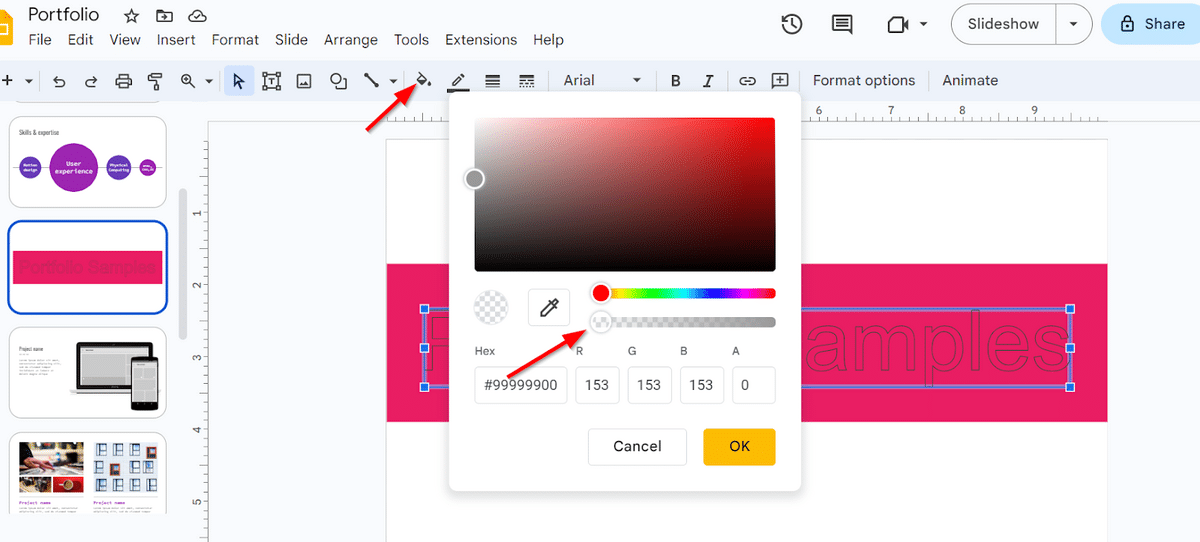
This is what the final result should look like:
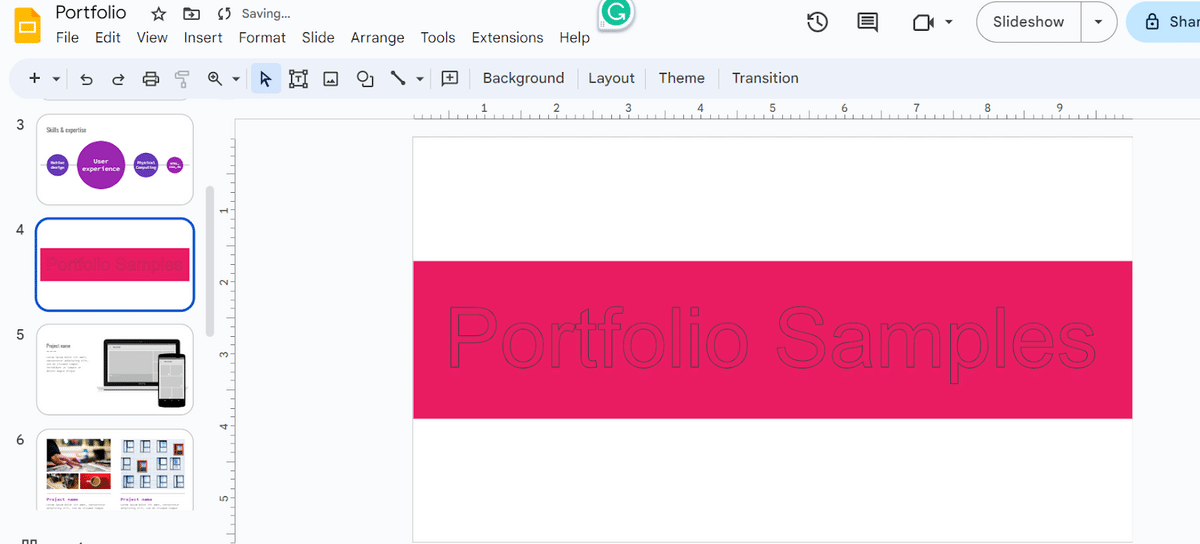
You have now successfully changed the opacity of text using Google Slides!
Are There Other Ways to Make My Google Slides Presentation Stand Out?
If you’re looking for other ways to make your Slides presentation stand out for the right reasons, here are two ideas:
GIFS
Gifs can be a great way to add life to your Slides presentation. Check out how to add GIFs to Google Slides.
Google Sheets Tables
Adding Google Sheets data to your Google Slides presentation is another great way to demonstrate statistical data (or any other type of data that is better understood in this format).
Frequently Asked Questions
Can Images Be Semi-Transparent in Google Slides?
Yes. In Google Slides, images can be semi-transparent (and even completely transparent!). Open the Format Options panel by clicking on the image. Open the Adjustments option in the panel, then increase/decrease the transparency of the image by moving the slider to the left or right.
Can I Copy & Paste a Shape to Another Slide?
Yes, you can paste a shape from one slide to another in Google Slides. Click the shape, then select “Copy” from the “Edit” menu (“CTRL + C” on Windows/ “CMD + C” on macOS). Select paste from the menu that appears when right-clicking on a blank area on another slide. You can also use “CTRL + V” on Windows or “CMD + V” on macOS to paste the shape. The same procedure applies to text boxes and images that are copied and pasted.
Conclusion
In addition to providing brief explanations, most businesses prefer to give well-designed presentations that fully illustrate project concepts.
Depending on a platform’s capabilities, including high-quality images can increase the reception of your presentation. We sincerely hope that this article has helped you understand how to make a shape transparent in Google Slides!
To help you gain a professional edge in your daily life, be sure to check out these amazing GSuite courses!
Related:
- How to Change Slide Size in Google Slides [Easy Guide]
- How to Add a Video to Google Slides [Complete Guide]
- How to Make Google Slides Play Automatically


