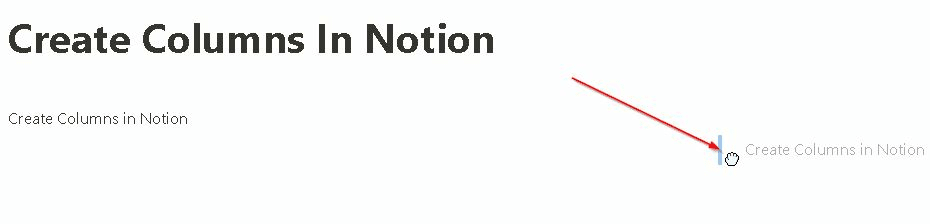
Are you new to using Notion and want to learn how to make columns in Notion? Notion is a popular productivity and documentation platform that simplifies task management, intranet setup, project tracking, and more. Among the many formatting options available to users is the ability to create two or more columns. The process is as simple as typing a front slash followed by the word “column,” and a few options should appear on-screen.
But that’s not the only way to create columns as you see fit. In this guide, we’ll discuss how to make columns in Notion through different methods. We’ll also tackle adding column headings, toggles, and more.
Let’s get started!
Table of Contents
How To Make Columns In Notion Using Different Ways
Columns are a popular feature in Notion, as they allow you to view and organize your data in a more structured way. Here are some ways to make columns in Notion:
Front Slash Method
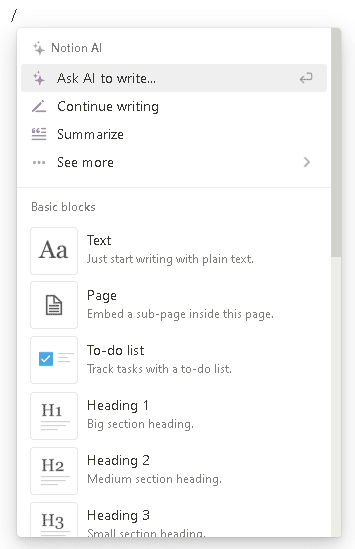
In Notion, typing a front slash while you’re on a block is a quick way to see all the formatting options and other media you can add to that block. That being said, simply follow the steps below to create Notion columns using the front slash method:
- To get started, navigate to the page where you’d like to create your columns in Notion.
- Next, position your keyboard cursor on one of the blocks and type a front slash (/). A small pop-up should appear with various formatting and media options to choose from.

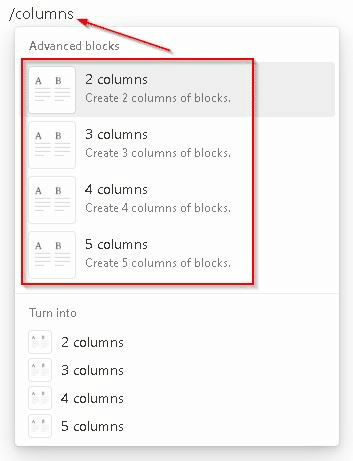
- After the front slash, continue typing the word “columns,” and the options in the pop-up will be narrowed down to ones for column creation. You can choose between two to five columns. Select the option that works for you.

Hotkey Method
Like other platforms, Notion has its share of hotkeys that make navigating the program much easier. One of these hotkeys is Ctrl + front slash (/) which brings up the actions pop-up. Here’s how to make two columns in Notion — or more — using the hotkey method:
- First, navigate to the page where you’d like to create your columns in Notion.
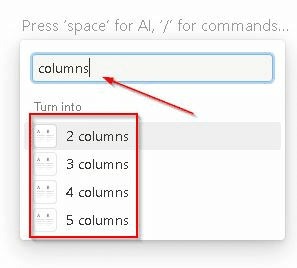
- Next, position your keyboard cursor on one of the blocks and press ctrl + front slash (/) simultaneously. A small pop-up will with a textbox on the very top.

Note: You can also access this pop-up by left-clicking the six dots icon on the very left side of a block.
- After that, type out “columns” in the textbox to see options for creating between two to five columns. Select the number that suits you, and the corresponding number of columns should appear on your Notion page.


Drag-And-Drop Method
If you’re not keen on going through pop-ups and want a quicker way to add columns to your Notion page, then the drag-and-drop method is a better option. This is how to create columns in Notion by dragging and dropping blocks:
- To get started, navigate to the page where you’d like to create columns in Notion and type out a phrase or sentence in an empty block to make the drag-and-drop process easier.
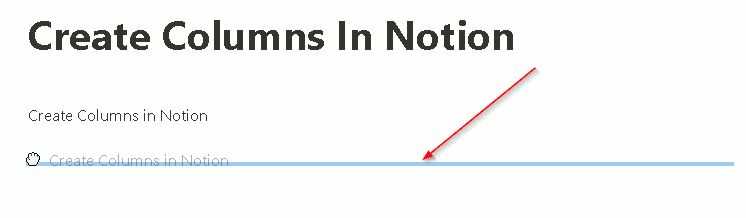
- Next, on the very left of the block, you should see an icon made out of six dots. Press and hold left-click on this icon, then drag it downwards until you see a horizontal blue line appear but don’t let go just yet.

- From there, continue dragging the block to the far right side of the horizontal blue line. The long horizontal blue line should turn into a short vertical one. Once you see this, let go of the left click, and the block you dragged should appear in another column.
How To Add Columns In Notion Using The iPad App
While a Notion app is available on Android and iOS devices, the add column feature doesn’t function too well on all of them. On mobile phones, for example, adding a column seems to just add another block underneath the one you had highlighted. This may be due to the screen size limitation.
However, doing the same thing on an iPad works just fine, with the column appearing properly beside the highlighted block. That being said, here are the steps to add columns to your Notion page using the iPad app:
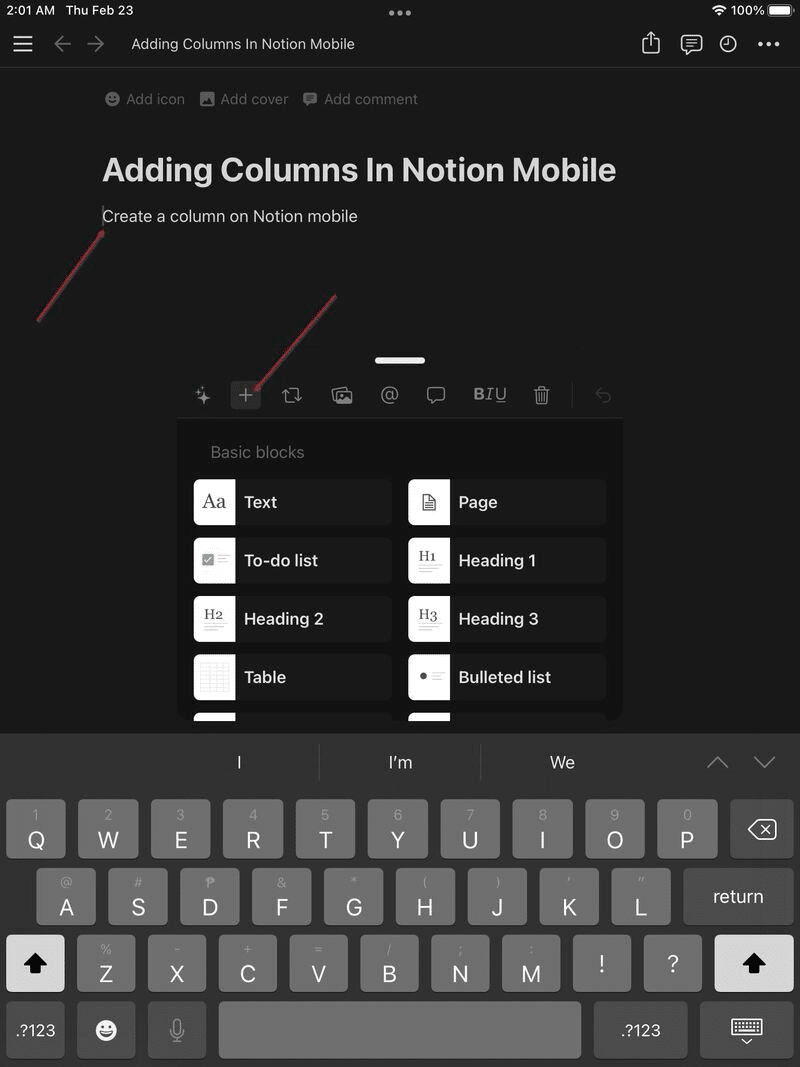
- First, launch Notion on your mobile device and head to the page where you want to add columns.
- Tap a block on your screen to bring up the keyboard, then tap the + button above the keyboard to bring up some formatting and media options.

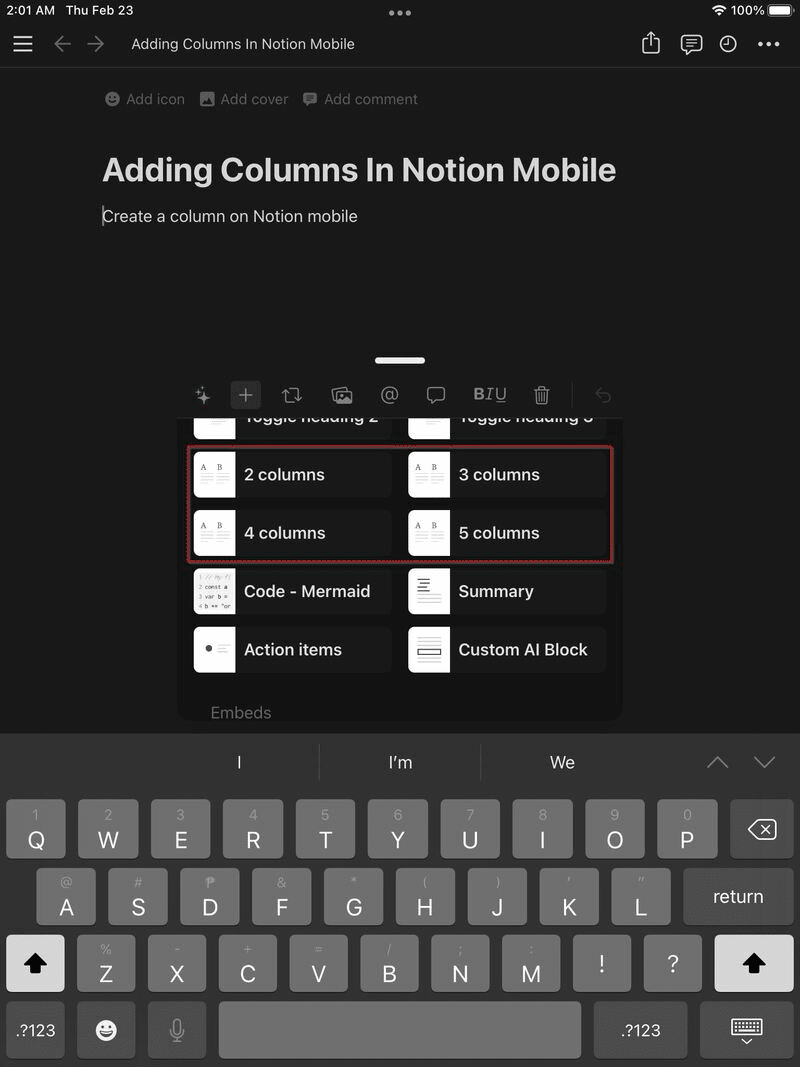
- Next, scroll down to the “Advanced blocks” section, and you’ll find the options to add between two to five columns. Select the appropriate option, and the corresponding columns should be added to your Notion page.
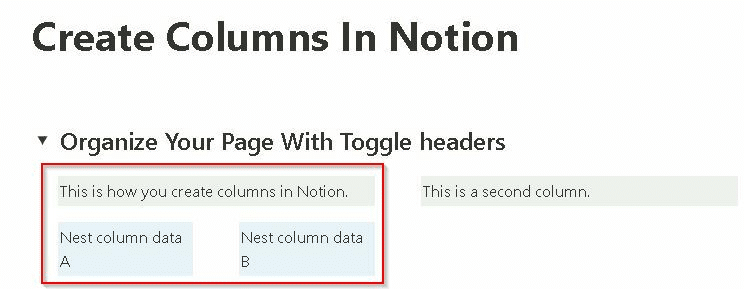
Organizing with Toggles
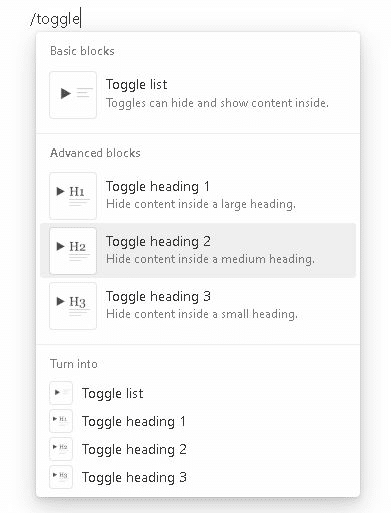
If your page looks cluttered, Notion has an awesome toggle option that allows you to hide and unhide blocks with the click of a button. That way, you can show the information you want on-screen at any given time while hiding the rest, giving your page a more organized and elegant finish. Toggle headers or lists can even house multiple columns within them.
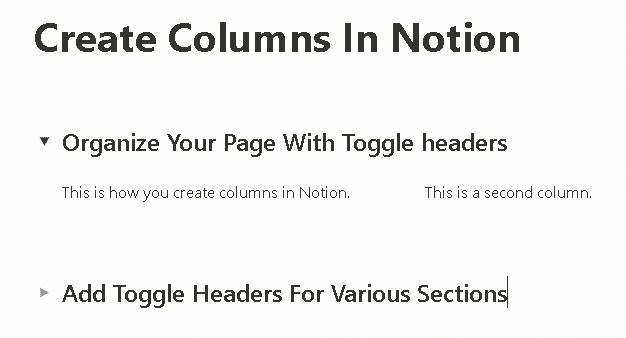
To create a toggle list or heading, all you have to do is put your keyboard cursor on a block and type front slash followed by “toggle.” A pop-up should appear with various toggle options to choose from. Simply select the one you want to work with, and it’ll be added to your page. From there, you can create columns or whatever else you’d like within the toggle option.
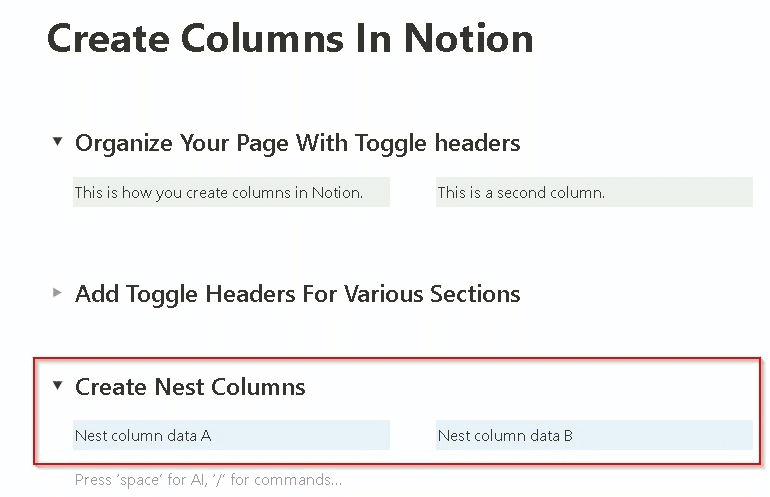
Nested Columns in Notion
Normally, you shouldn’t be able to add two or more columns underneath another column using the abovementioned methods. But there is a trick you can do to pull it off.
- To start things off, create a toggle Notion header with the columns you want to add underneath the existing column

- From there, left-click the three dots icon on the left of your toggle header and drag it right underneath the column you want to nest it under.

- You should see a blue horizontal line appear underneath the column. Once you see that, release the left click.


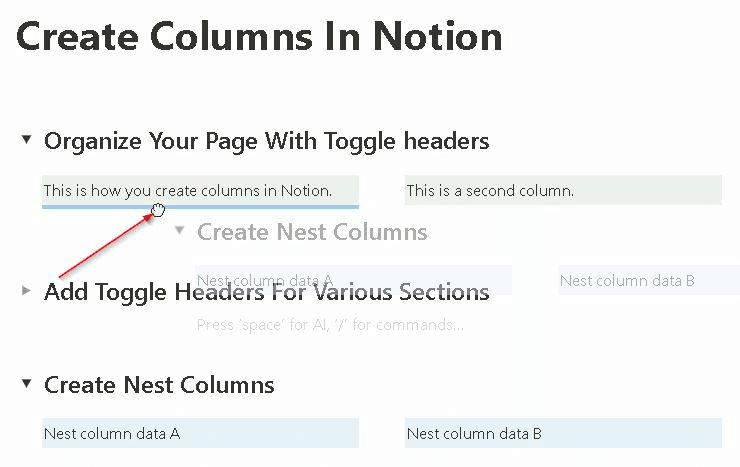
- The toggle header and columns should now be situated right underneath the column that you want to nest other columns under.

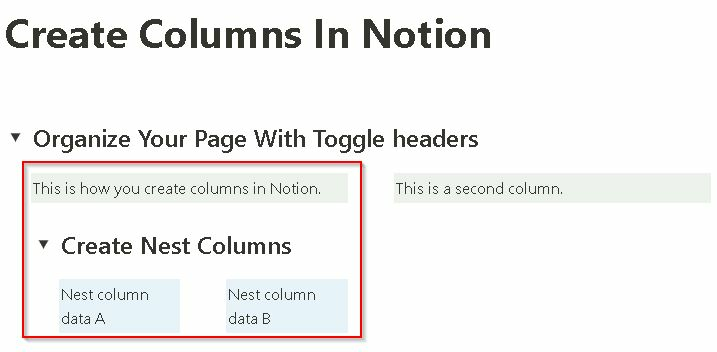
- Next, you’ll need to click the six dots icon on the left of the toggle header, then select “Turn into” > “Heading 1, 2, or 3.” This will separate the header from the columns you’re trying to nest.

- Finally, you have to delete the header on top of the columns you’re attempting to nest, and they should appear right underneath the single column.


Frequently Asked Questions
How To Make Columns Evenly Spaced in Notion?
Looking to make the spacing in your Notion headers equal without having to drag them around manually? Simply hover over the gap between your columns until a vertical line appears. From there, double-click that line, and your columns should become evenly spaced.
How Do You Sum a Column in Notion?
If you have a table on your page with a column full of numbers you’re trying to sum up, Notion has a function to do the work for you. All you have to do is hover your mouse underneath the last row of the column you want to sum up, and a “Calculate” option should appear.
Click it to bring up a drop-down and select “Sum.” A field should now appear below that column showing you the sum of its figures.
How Do You Add a Divider to Notion?
A divider is a good way to split up your Notion page into different sections. To add one, place your keyboard cursor on an empty block and type “/divider.” A small pop-up should appear with that option. Just click it, and a divider should appear on your page.
How Do You Delete a Column in Notion?
Left-click the six dots icon on the left of the column you want to delete and select the “Delete” option. This should cause the remaining columns — if there are any — to shift accordingly.
Why Can’t I See Columns on My Phone or Tablet?
As discussed above, adding columns doesn’t work too well when using the app on most mobile devices. Whenever you attempt the function, another block is created underneath the highlighted one. This may be due to the limited display size available on mobile devices. The exception here is the Notion app on iPads, which appears to facilitate column creation properly.
Conclusion
Creating columns is one of the more basic functions in Notion, and there are a few ways to go about it. Luckily enough, it’s a relatively simple process, and the methods outlined above should teach you how to make columns in Notion in no time at all.
To learn more about Notion and how you can use it to organize your personal and work life — take a look at these helpful online courses. Whether you’re a beginner or an advanced user, here’s to planning and getting things done with Notion.
Related:
- How to Autofit Column Width in Google Sheets
- How to Move Columns in Google Sheets
- How to Insert Multiple Columns in Google Sheets
- The 7 Best Free Spreadsheet Software
- Can Google Sheets Highlight Rows Based on Cell Data
- How to Change Fonts in Notion [Easy Guide]
- 7 Best Notion Training Courses to Take [Free + Paid]
- How to Embed Google Calendar In Notion