Working with dates in Excel is a common occurrence, and there are situations where you may need to add months to a date in Excel. This can be tricky because dates have their own formats, and there are several date-related functions in Excel.
However, not to worry, we’re going to make this really simple for you in this guide for how to add months to a date in Excel.
We’ll look at different date functions and how to find the last date at the end of the month in Excel.
Table of Contents
Download Our Example Spreadsheet
Before we start, you can get a copy of our Example Worksheet below to make it easier to follow along with this tutorial on adding months to date.
How To Add Months to a Date in Excel
Just like in Google Sheets, adding months to a date in Excel is not a difficult task. There are two functions you can use for this, including the EDATE and DATE functions.
Below, we will show how to use both formulas with examples.
How To Add Months to a Date in Excel with the EDATE Function
You may use the EDATE function to add and subtract a month from a date value. This formula is versatile and can be used to both add and subtract dates.
The EDATE function requires two arguments. The first argument is the date, and the second is the time to subtract the month. You can use an EDATE calculation to move dates forward in time.
The following is the syntax for the EDATE function:
=EDATE(start_date, months)
- start_date: This refers to the months that will be added
- months: This can be the cell reference or a number representing the number of months. It can be a positive number or a negative value, allowing it to add or subtract months
The calculation based on the EDATE function must be followed in terms of dates and the number or subtractions of months in each column.
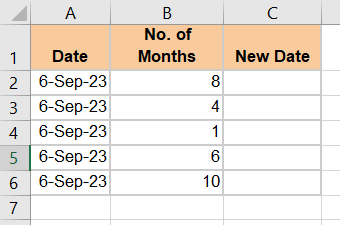
Here’s how to use the EDATE function to add months to a date in Excel:
- Select a cell and type: =EDATE(

- Enter or select the cell with your date. In our example, that is cell A2.


- Add a comma (,) to enter manually. Or select the cell with the number of months. In our example, that is cell B2.


- Click “Enter.”
- You will likely receive a strange value as the answer to this formula, like below.

- The answer isn’t wrong, rather, it is in the wrong format. To fix this:
- You will likely receive a strange value as the answer to this formula, like below.

- Select the cells for the new dates.


- Go to the “Home” tab in the Excel ribbon.
- Select the drop-down option that says “General.”


- Choose one of the date formats. In our case, we chose the short date.


This will convert your results into dates like in our example below:

Then, you can copy the formula to the rest of your selected cells.
- You can do this by copying and pasting the formula or dragging the small box at the bottom right of the selected cell.

For this example, we’ve used the simple formula:
=EDATE(A2,B2)
The above formula adds months to the selected date. It’s an easy formula to use since it only has two arguments.
How To Add a Month to a Date in Excel with the MONTH and DATE Function
The MONTH, DATE, and DAY functions combine three values into one and can allow you to add months to a date.
The following steps guide you through adding the month to Excel using the MONTH and DATE function.
The syntax for this formula is:
=DATE(YEAR (start date), MONTH(start date) + months, DAY(start date))
While the date formula might look long and complicated, it’s incredibly straightforward.
The start dates all represent the same date in this Excel formula. And the YEAR, MONTH, and DAY functions are there to format the values.
You simply need to add your months to the MONTH function. You can also use negative numbers in this formula.
Here’s how to add a month in Excel using the DATE formula:
- Select a cell and type: =DATE(

- Add the YEAR after the opening brackets.
- Enter or select the cell with your date. In our example, that is cell A2.


- Close the brackets and add a comma (,).
- Add the MONTH and open the bracket.
- Select the cell with the exact date value and close the brackets.


- Add the plus sign (+) and select the cell with the number of months.


- Add a comma and type the DAY formula: DAY(
- Enter or select the cell with your date and close the brackets.


- Click “Enter.”


For this example, we’ve used the following formula:
=DATE(YEAR(A2), MONTH(A2)+B2, DAY(A2))
This will return the same result as the EDATE formula in the first example. You may also need to format the cells for this formula to get the correct date format.
How To Subtract Months to a Date in Excel
You can use the same method to add months to a date in Excel. Or, if you want to subtract months, you need to tweak the Excel formula. Let’s take a look at subtracting dates below.
Subtracting Dates with the Excel EDATE Function
When placing your dates in the formula, you can use the EDATE formula to subtract the dates from each other. This also works in the same way as when you add months.
To subtract months using the EDATE formula, all you need to use is a negative number. Here’s how:
- Select an empty cell and type: =EDATE(
- Enter or select the cell with your date. In our example, that is cell A2.

- Add a comma (,) and the minus sign (-).


- Enter the negative number manually or select the cell with the number or months. In our example, that is cell B2.

- Click ‘Enter.’


- Copy the formula to the rest of the cells.


For this example, we’ve used the following formula:
=EDATE(A2,-B2)
If you get a number value instead, you can change the format to a date format by navigating to “Home” > “Format” > “Format” > “Format Cells” > “Date” and then selecting the date format you wish to use.
Subtract Months from a Date Using the DATE Function
You can also subtract the months from a date in Excel using the DATE function. The only difference in the following will be to use the minus sign (-) instead of the plus sign (+), as you’ll see in the following example.
You can follow the below steps to subtract months in Excel using the DATE formula:
- Select a cell and type in the DATE function: =DATE(
- Add the YEAR after the opening brackets.
- Enter or select the cell with your date. In our example, that is cell A2.

- Close the brackets and add a comma (,).
- Add the MONTH and open the brackets.
- Select the cell with the exact date value and close the brackets.
- Add the minus sign (-) and select the cell with the number of months.


- Add a comma (,) and enter the DAY formula: DAY(

- Enter or select the cell with your date and add the closing parenthesis.
The formula can also be used to subtract days or to subtract years. You simply need to add or subtract them to their respective arguments.
How To Add Months to the Date at the End of the Month
One challenging thing about dealing with dates is that the months have varying days. This can make adding months difficult, leading to inaccurate return dates.
When you add a fixed number of months to an end-of-month date, you want Excel to adjust the day component to the last day of the month for the future date.
Let’s look at the example below with the two dates:

For the first given date, the future date falls in September, so the date is to end on the 30th. However, the second given date returns the new date in August, which ends on the 31st.
In such a situation where you need the correct last date for the next month’s date, you can use the EOMONTH instead of the EDATE or DATE formulas.
It works the same way as the EDATE formula, but it will give you the exact last day of the month.
The syntax for the EOMONTH formula is:
=EOMONTH(start_date, months)
- start_date: This is the date that will add the months
- months: This is the cell reference or the number of months to a date
Here’s how to use the EOMONTH function to add months to a date in Excel:
- Select a cell and type: =EOMONTH(

- Enter or select the cell with your date. In our example, that is cell A2.


- Add a comma (,) to enter the months manually. Or select the cell with the number of months. In our example, that is cell B2.


- Click “Enter.”
- Copy the formula to the rest of the cells.

In this example, we’ve used the following formula:
=EOMONTH(A2,B2)
You can see that the last day is different and shows the 31st of August instead of the 30th.
Frequently Asked Questions
How Do I Add 30 Months to a Date in Excel?
You can add 30 months to a date in Excel using the EDATE formula. For the starting dates, you can select the cell with your date and then use 30 for the months.
The EDATE formula will look like the formula below, where C2 is the cell reference with your specific date:
=EDATE(C2, 30)
How Do I Add Months to a Date in Excel?
Excel can add months to date using the DATE or EDATE formulas. We’ve shown how to use each one of these functions above.
Wrapping Up
Adding months to a date in Excel is as easy as pie using the functions above. We’ve shown you how to use the EDATE and DATE functions to add months to a date in Excel.
You can learn more functions and continue to master Excel with our guide to the best courses for Excel. You can also head over to Gumroad and get our templates at a discount of 50% using the code ‘SSP.’
Related: