Most weekly planning apps want you to commit to their workflow. This free Google Sheets weekly schedule template does the opposite. Open it, copy it, edit anything you want, and start using it in under a minute.
It comes with four tabs covering the most common ways people plan a week: a time-blocked Weekly Planner, Daily To-Do Lists, Goals and Priorities, and Notes and Reflections. No app to install, no signup, no learning curve.
What’s in the Weekly Schedule Template
Four tabs, each built for a different part of weekly planning:
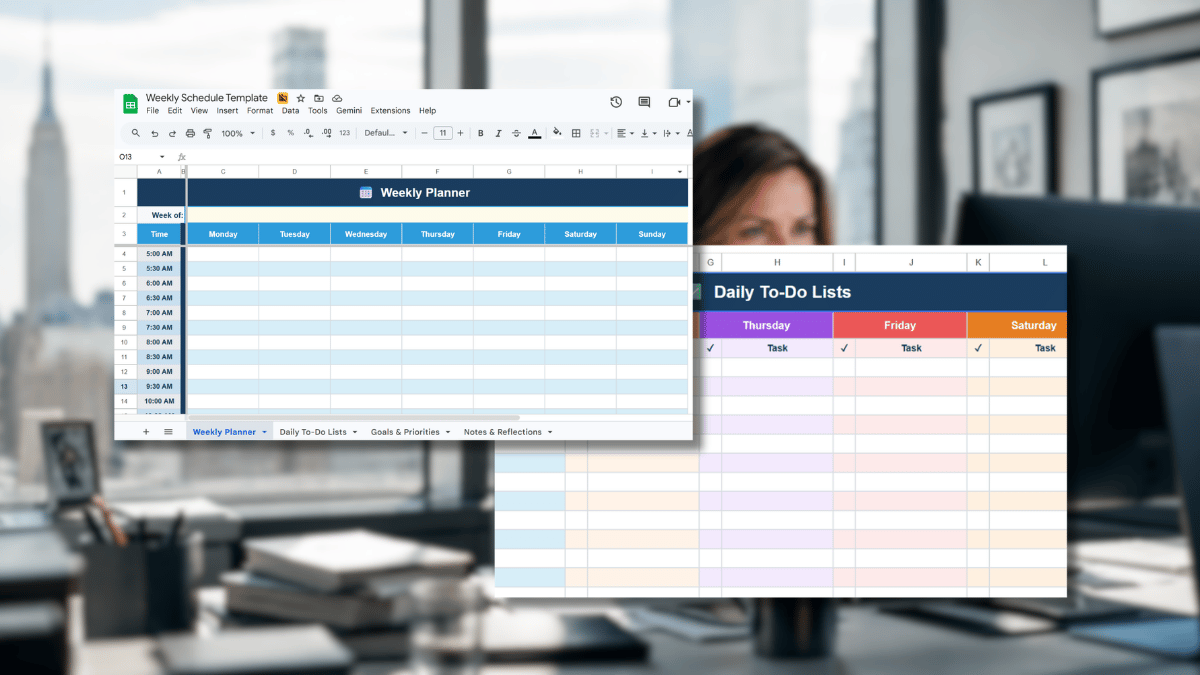
- Weekly Planner. A time-blocked grid covering Monday through Sunday in 30-minute increments from 5:00 AM to 10:00 PM. Add a “Week of” date at the top and use any time slot as a calendar block for meetings, deep work, or personal time.
- Daily To-Do Lists. Seven color-coded columns, one per day, with up to 20 task rows each. A checkbox column on the left lets you mark items as done at a glance.
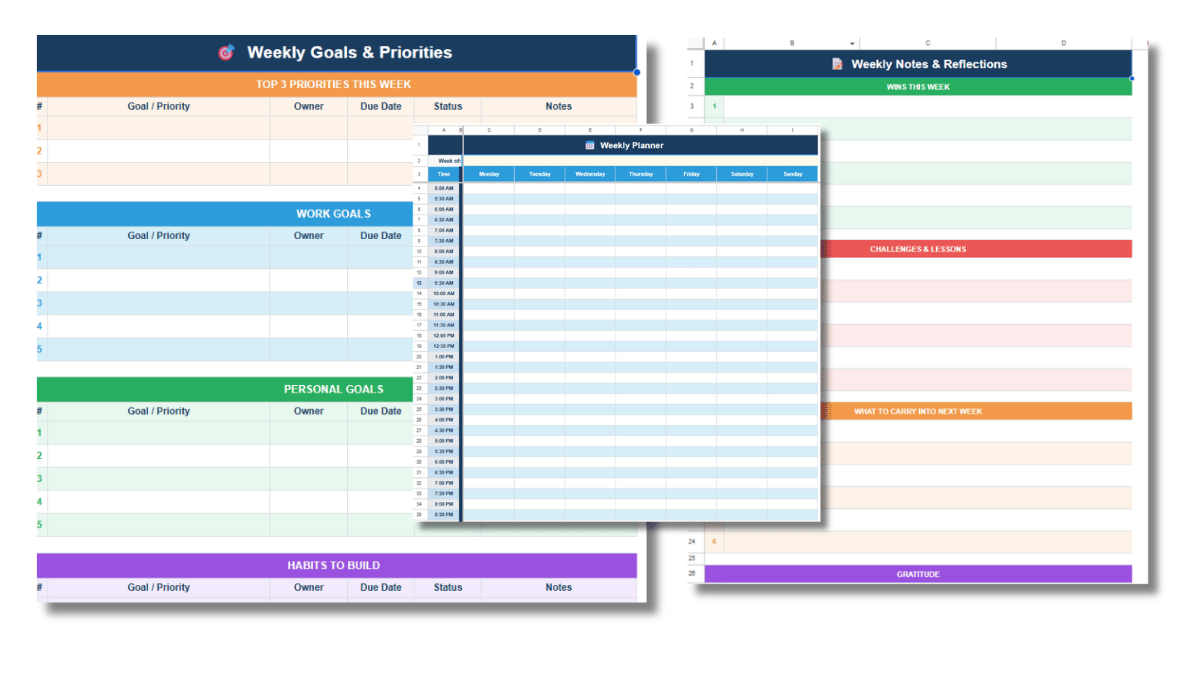
- Goals and Priorities. Four sections covering your top 3 priorities for the week, work goals, personal goals, and habits to build. Each row has space for owner, due date, status, and notes.
- Notes and Reflections. Structured space for wins, challenges, what to carry into next week, gratitude, and free notes.
Everything is editable. Add columns, rename sections, change colors, or delete tabs you do not use. The template is a starting point and not a system you have to follow.
How to Use the Template
Step 1: Make a Copy
Click the download link above. Google Sheets will open a “Copy document” prompt. Click Make a copy and the file saves to your Google Drive under your account. Rename it whatever you like. Note that you’ll need to log into a free Google Account to make your copy.
You only need to do this once. After you have your copy in your own drive, you can edit it freely. The same file can be reused every week.
Step 2: Set the Week
On the Weekly Planner tab, type the start date of the week into the highlighted cell next to “Week of.” Use this as the reference point for everything else in the file. You can also right click that tab and make a copy to duplicate your schedule from one week to the next.
Step 3: Block Time on the Weekly Planner
Click any cell in the day columns and type what you are doing during that time slot. Meetings, focused work, gym, school pickup, anything. Each cell holds a single line of text by default, and you can wrap longer entries by pressing Alt+Enter (Option+Enter on Mac).
The first column on the left lists every time from 5:00 AM to 10:00 PM in 30-minute blocks. The Time column and the day headers stay frozen as you scroll, so you can always see what slot you are filling in.
Step 4: Build Out the Daily To-Do Lists
Switch to the Daily To-Do Lists tab. Each day from Monday through Sunday has its own column with a small checkbox column on the left and a task column on the right. Type a task in the task column. To mark it complete, type the checkmark character or any letter you want into the checkbox cell. The format is intentionally simple.
If you prefer real checkboxes, select the checkbox cells and use Insert > Checkbox. They will work the same way and are easier to tap on mobile.
Step 5: Set Your Goals and Priorities
The Goals and Priorities tab keeps your top 3 priorities visible at the top of the sheet, with separate sections for work goals, personal goals, and habits below. Use the Status column as a dropdown if you want by selecting the cell, going to Data > Data validation, and adding statuses like Not Started, In Progress, and Done.
The owner column is useful if you share the file with a partner or team. Otherwise, leave it blank.
Step 6: Capture Notes at the End of the Week
The Notes and Reflections tab has labeled sections for wins, challenges, what to carry forward, gratitude, and free notes. Fill it in on Friday afternoon or Sunday evening, depending on how you close out a week.
This tab is the part most people skip. It is also the part that makes the file useful longer term, because reading back through last week’s notes is what shapes next week’s priorities.
Why Use Google Sheets Instead of a Calendar App
Calendar apps are built for events. They handle meetings, reminders, and recurring blocks well. Where they fall short is everything that is not an event: tasks, goals, weekly reflections, and the messy middle of figuring out what your week should look like before you commit times to anything.
A spreadsheet handles all of that on a single surface. You can see your time blocks, your task list, and your goals together. You can edit anything. You can copy the whole file at the start of a new week. You can share it with a partner or a team and edit it live. None of that requires a paid plan or an app on your phone.
It also lives in your Google Drive, so it syncs across every device with a Google account. Edit on your laptop and the changes show up on your phone within seconds.
Customizing the Template
A few common adjustments people make:
- Different time range. If you do not need 5:00 AM blocks, delete those rows. If you work later, drag the bottom row down and add new time slots in the same 30-minute pattern.
- Different week start. If your week starts on Sunday, click the Monday column header and use Edit > Move > Column right until Sunday is in the first position. Repeat for each day.
- Color-coded categories. Use conditional formatting to color time blocks based on type. Select the day columns, go to Format > Conditional formatting, and add a rule that colors any cell containing the word “meeting,” “deep work,” or whatever category you want.
- Recurring tasks. Type a recurring task once on the Daily To-Do Lists tab, then copy and paste it across days. Or add a new tab called “Recurring” and reference those rows in your daily lists with formulas.
- Print view. Go to File > Print and set the orientation to landscape, scale to fit width, and uncheck gridlines if you want a cleaner page.
Building a Weekly Schedule from Scratch
If you would rather build your own from the ground up, the basic structure is straightforward:
- Open a new Google Sheets file from your Google Drive.
- In row 1, type “Time” in column A and “Monday” through “Sunday” in columns B through H.
- In column A, starting in row 2, list every time slot you want. The fastest way is to type “5:00 AM” in A2 and “5:30 AM” in A3, then select both, grab the fill handle in the bottom right corner, and drag down to autofill the rest.
- Add a freeze pane by clicking View > Freeze > 1 row and 1 column. The headers and time labels stay visible while you scroll.
- Style the header row with bold text and a fill color so it stands out.
- Adjust column widths so each day has enough room for a sentence.
That gives you the core grid. From there you can add a tabs for to-do lists, goals, and notes by clicking the plus sign in the bottom left and following the same logic.
Other Templates That Pair Well With This One
This weekly schedule covers personal and individual planning. If your week involves more specific tracking, a few related templates handle different pieces:
- For tracking habits day by day with completion percentages, the habit tracker template is built specifically for that.
- For projects with deadlines, dependencies, and multiple people, the project management template uses a Gantt-style timeline.
- For monthly and yearly views, the Google Sheets calendar template covers a longer time horizon.
- For day-by-day planning at a more granular level, the daily schedule template goes deeper than this one.
- If you are managing a team’s hours and shifts, the employee shift schedule template is the right tool. This one is built for individuals.
Frequently Asked Questions
Is the weekly schedule template free?
Yes. The template is free to copy and use. You will need a free Google account to save it to your Google Drive.
Can I use this template offline?
Yes, with one setup step. Open the file in Google Sheets, click File > Make available offline, and the file will sync to your device for offline editing. Changes upload to Drive the next time you connect.
Can I share the template with someone else?
Yes. Click the green Share button in the top right of Google Sheets, enter their email, and choose Viewer or Editor permissions. They will need a Google account to edit. If you want to share the original template with someone so they can make their own copy, send them the same link you used to copy it: it always opens to the “Make a copy” prompt.
Does this template work in Excel?
Yes, with minor adjustments. Download it from Google Sheets as an .xlsx file by going to File > Download > Microsoft Excel (.xlsx). The formatting transfers cleanly. A few features like real-time collaboration and the dropdown style behave slightly differently in Excel, but the structure is the same.
How do I add real checkboxes to the to-do list?
Select the checkbox column cells, go to Insert > Checkbox, and Google Sheets will replace the cells with clickable checkboxes. They work especially well on mobile, where tapping is faster than typing a checkmark character.
Can I use this template every week without making a new copy?
Yes. The fastest workflow is to use the same file every week and overwrite the previous week’s content. If you want to keep records of past weeks, duplicate the tabs at the start of each new week by right-clicking each tab and selecting Duplicate, then rename the duplicates with the date.
Why is the Weekly Planner a separate tab from the Daily To-Do Lists?
Time blocking and task lists serve different purposes. Time blocks tell you when something happens. Task lists tell you what needs to get done. Keeping them on separate tabs lets you scan one without the other clutter, and it lets you reference both without scrolling through one giant grid.