When working with data in Google Sheets, you’ll probably need to insert multiple rows between the existing rows (or at the top/bottom of a dataset).
Learning how to insert rows in Google Sheets is pretty straightforward – and it only takes a couple of clicks!
I’m here to show you the best step-by-step instructions to tackle this task. Let’s get started!
Watch Video – How to Insert Multiple Rows in Google Sheets
Fastest Method: How to Insert Multiple Rows in Google Sheets
When inserting multiple rows in a Google Sheets document, select click and drag the mouse on the cells. Otherwise, you can hold the Shift key down and use the up/down arrow buttons to select the cells. Next, right-click the selected cells and choose the Insert ‘X’ rows above option.
This is actually the quickest way to add rows in Google Sheets, but I’ll show you more methods below!
Getting Started: Inserting a Single Row in Google Sheets
To insert rows in Google Sheets one at a time – above or below a specific row – you can use a built-in feature.
Using the Insert Tab
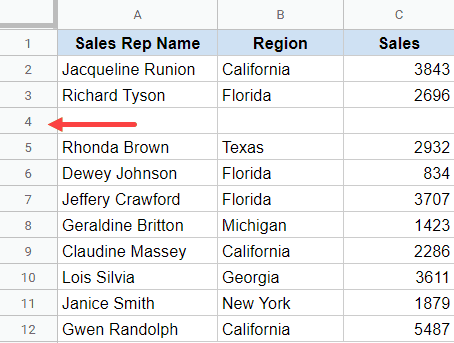
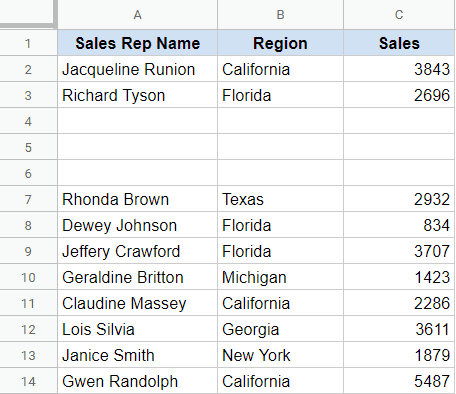
Suppose I have a dataset and want to insert a row above row #4.
Using the Insert Tab
Suppose I have a dataset and want to insert a row above row #4.
- I’d start by clicking on the row number on the left (or any cell in the dataset).

- Next, I’d select Insert > Rows > Insert 1 row above.

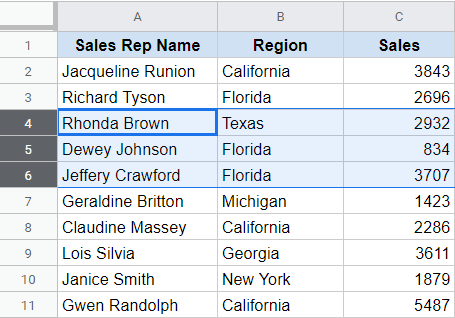
These steps will insert one blank row above the fourth row.

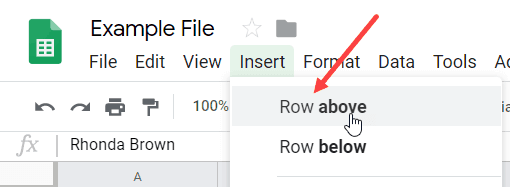
If I wanted to insert a row below the selected row, I’d choose Insert > Rows > Insert 1 row below.
Inserting Multiple Rows in Google Sheets Using the Right-Click Menu
Use the right-click method to quickly insert any number of consecutive rows above or below the selected row.
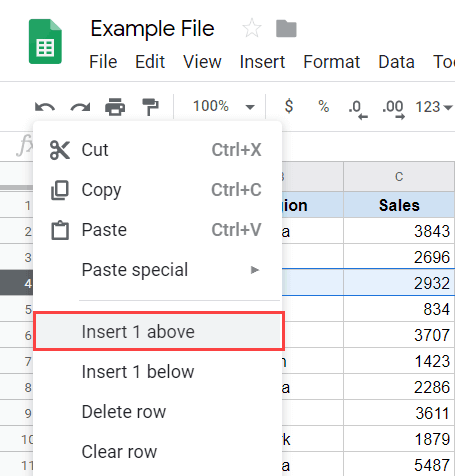
Once you select the desired row header on the left side:
- Right-click on the selection.
- Click on the ‘Insert 1 above’ option (or ‘Insert 1 below’).

Can I Insert Non-Consecutive Rows?
Unfortunately, there’s no way to select non-consecutive rows and insert them above selected rows. Believe me, I’ve tried!
For example, if you select rows 5, 8, and 11 and try to insert a row above each, it won’t work. The “Insert” option will be unavailable.
Limitations of Using Right-Click for Row Insertion
When you select the row header (the number at the extreme left of the row) and right-click, you can insert a row above/below the selected area. However, when you select a cell in the dataset and use right-click, it only shows the option to insert the row above. This is one of the limitations of Google Sheets.
Adding Multiple Rows in Google Sheets (Above or Below)
Just like I’ve inserted single rows, I can also insert multiple rows with ease. The steps remain exactly the same – with just one minor change.
Using the Insert Tab
Suppose I have a dataset and want to insert three rows above row #4.
- I’d select three rows by highlighting the row header on the left.

- Next, I’d select Insert > Rows > Insert 3 rows above.
Following these steps would insert three blank rows above the selection:
Can I Insert Any Number of Rows in Google Sheets?
This process will always insert the same number of new rows you’ve selected. If you select 35 rows, it will insert 35 new rows above the selection.
Related: How to Insert Bullet Points in Google Sheets
Using the Right-Click Menu
The right-click menu is another way to insert multiple rows in Google Sheets. You can also group columns and rows through this menu.
Suppose you have a dataset and want to insert three rows above row #4.
- Select three rows starting from row #4 by selecting the row header on the left (or three cells in any row – starting from row #4). You could also hold Shift and press each row individually.
- Right-click on the selected row headers (or cells, in case you have selected cells).
- Click on the ‘Insert 3 above’ option.


You can also use the same method to use Google Sheets to insert multiple rows below the selected rows. Just choose the ‘3 Rows Below’ option in the third step. This works similarly to adding multiple columns.
Using the Keyboard Shortcut (F4)
Say that you want to insert rows above rows #3, 5, and 8. Since these rows are not consecutive, one option is to insert each row one by one (by following one of the previous methods).
You can also use a keyboard shortcut – F4 – to speed up the process (Note: On a Mac, you’ll need to hold “control” as you click.).
- Click on the row header of row #3 (or any cell in the dataset)
- Click the Insert > Rows > Insert 1 row above.
- Select any cell in row #5 and press the F4 key.
- Select any cell in row #8 and press the F4 key.
F4 is used to repeat actions. In this case, the last action was inserting a row above the selected row. While it may seem like too many steps, this process is pretty fast when used routinely.
Remember: F4 repeats your last action in Google Sheets. If you happen to do something while inserting rows (e.g., copy-paste), F4 will repeat that action – and not insert the row.
Inserting Multiple Rows at the Bottom of Google Sheets
By default, you get 1000 rows in a Google spreadsheet. To add more, use the Google Sheet insert row shortcut:
- PC: CTRL + Down Arrow
- Mac: CMD+ Down Arrow
This will take you to the very last row of your sheet. If you have data in your sheet, it will take you to the last cell of the specific column with data and then to the last cell of the column.
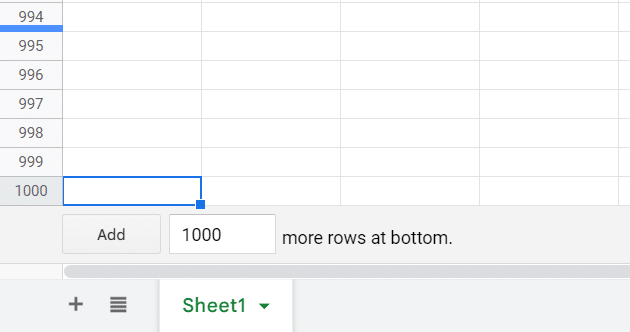
In the very bottom row, you’ll spot an option to “add X more rows at bottom” and a space to fill in the number of rows you want to add. Type the number you want, then click “Add.”
Frequently Asked Questions
Can I Insert More Than 1 Row at a Time in Google Sheets?
- Press Ctrl and left-click over the number of rows you want to add.
- Right-click on the selected row headers.
- Click “Add # rows above” or “Add # rows below.”
How Do You Insert Multiple Rows in Google Sheets on a Mac?
Press “Control” and click the selected row headers you want. Click “Add # rows above” or “Add # rows below.”
How Do I Automatically Add Rows in Google Sheets?
If adding rows was the last action completed, you can automatically add the same amount by using the F4 keyboard macro.
How Do I Copy and Paste Multiple Rows in a Google Sheets Spreadsheet?
Use the copy (Ctrl+C) and Ctrl+V (paste) shortcuts on selected rows.
Can You Insert a Row for Every Other Row in Google Sheets?
Unfortunately, there is no current way to add alternative rows to Google Sheets.
How Do I Add 10000 Rows to Google Sheets?
Scroll to the bottom of your spreadsheet. There, you’ll see an option to “add X more rows at bottom.” Fill the empty space with whatever number of rows you want, then click “add.”
Wrapping up
In this article, I’ve shown you how to insert multiple rows in Google Sheets (for both PC and Mac). Choose whatever method is the most convenient for you!
Now that you know how to insert multiple rows in Google Sheets, you may be interested in improving your skills. I always recommend taking extra GSuite courses – it’s the cheapest and easiest way to master this complex program!
Related reading: