No matter how good tech tools are, there are always going to be some glitches – and Google Docs words going off a page is one of them.
While this is definitely an annoying problem, it’s a simple one to solve. Here, I’ll show you how to stop words from going off the page in Google Docs with multiple troubleshooting options.
Table of Contents
How to Fix Google Docs Words Going off the Page
- Go to File > Page Setup.
- Set each Google Docs margins section to 1.
- Click Done.
Note: If this method doesn’t work for you, keep reading for more options!
Why Are My Words Running off the Page in Google Docs?
There are a few reasons why your words are going off the page in Google Docs.
1. Page Margin Settings
You’ve changed your page margin settings, maybe to save paper. The margin settings define the limits of your pages, and if they are set too narrow, it might cause words to run off-page in Google Docs.Related: How to Insert a Page Break on Google Docs
2. Complex Formatting
Complex formats, such as excessive indentation, line spacing, or paragraph settings, can contribute to text overflow.
3. Misaligned or Oversized Elements
Sometimes, misaligned and oversized elements like images or tables can disrupt the arrangement of your document, leading to the overflow of your text. Check your text wrapping or remove the element completely.
4. Extension Downloads
Conflicts between certain downloaded extensions and Google Docs can cause your text to go off the page. Rogue extensions and ad-blockers are the common culprits for this.
How to Fix Google Docs Words Going Off Page
Now that you know why your words go off the page on Google Docs, there are a few ways to fix it.
Method 1: Adjusting the Margins with Page Setup
Your margins may be too narrow, so you can stop words from going off the page in Google Docs by using the Page Setup menu:
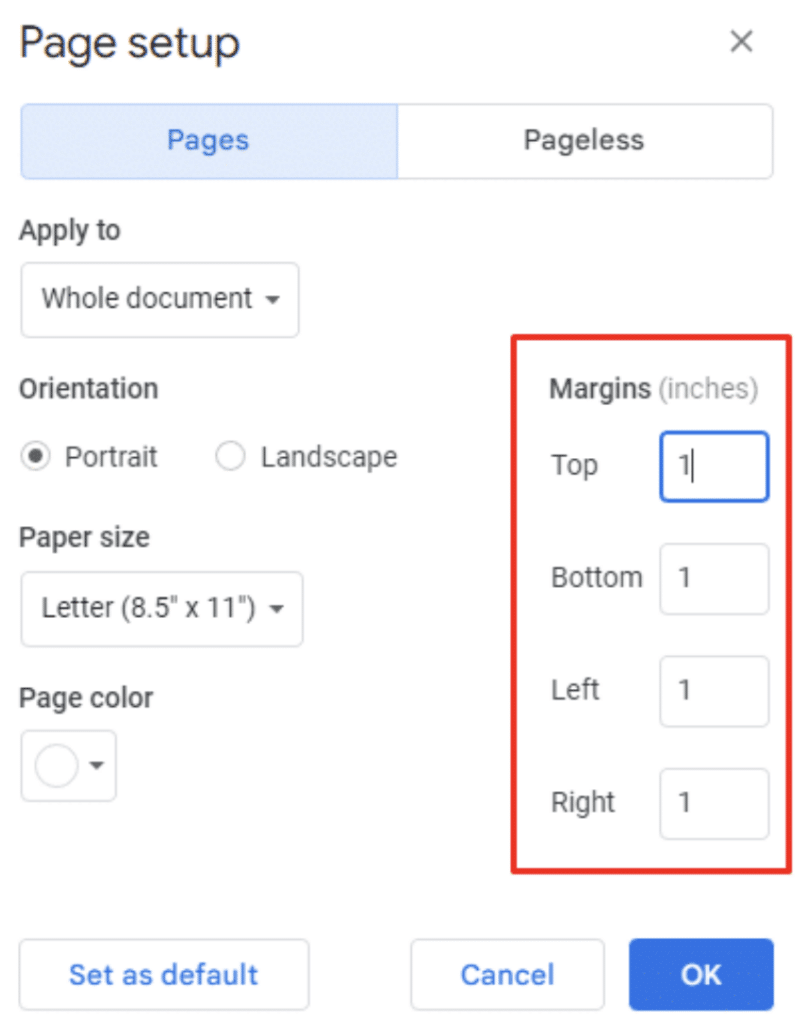
- Select File > Page setup.
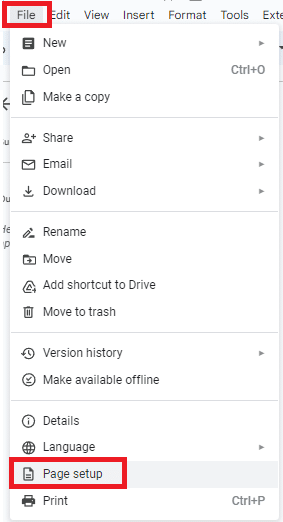
- Under Page setup, enter “1” into the top, bottom, left, and right sections.

- After making your changes, click “OK.”
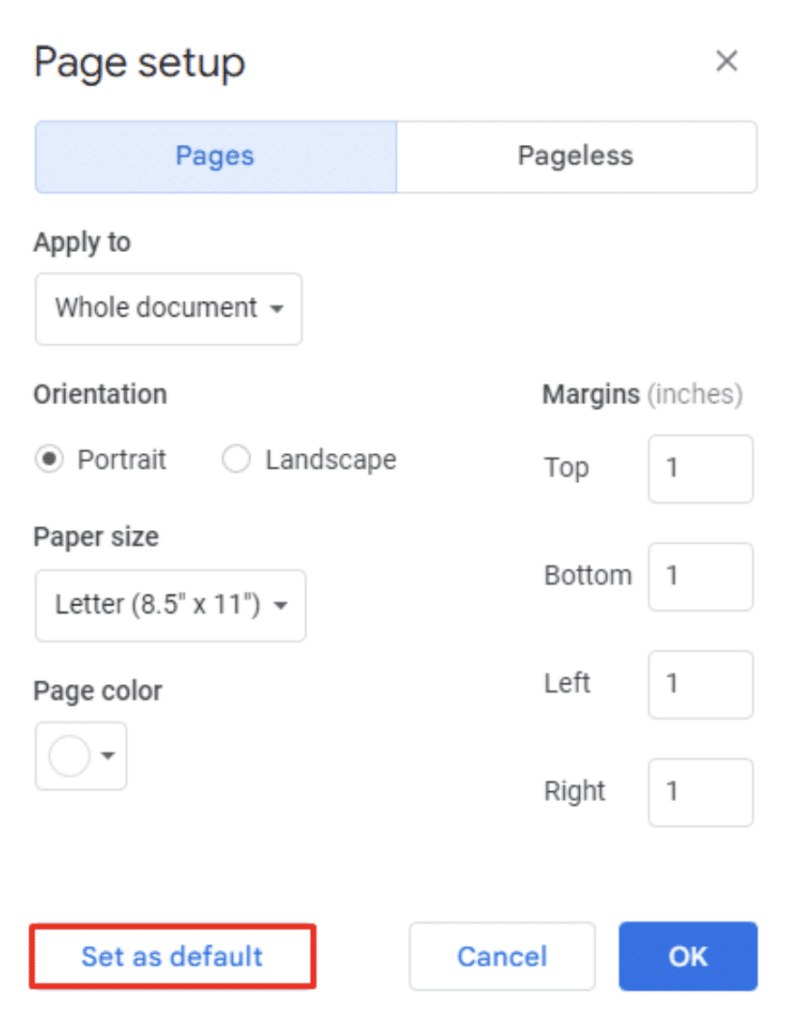
Note: To set a default margin size for all future documents, click “Set as default” in the bottom-left corner of the dialog box. This setting will only apply to documents created from your account, not documents shared by others.
Method 2: Using the Ruler Option
You can change margins in Google Docs with the ruler (at the top of the document). This method is useful for making small adjustments or fine-tuning margins. It also allows you to see the changes to the document’s layout in real time.
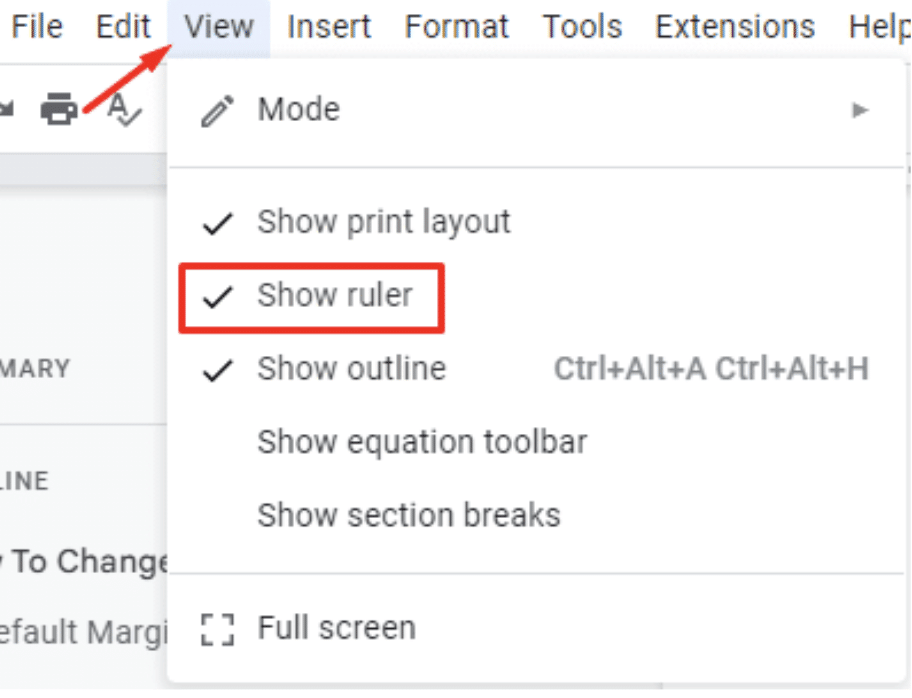
- Select View > Show Ruler (if it isn’t selected already).

- Place your cursor on the margin marker on the ruler that you want to adjust. The blue triangles on the top ruler indicate the top, bottom, left, and right margins.

- Click and drag the margin marker to the desired location. The margin values will automatically update in the ruler.
- Release the mouse button when the margin is set to the desired value. Repeat these steps for each margin that you want to adjust.


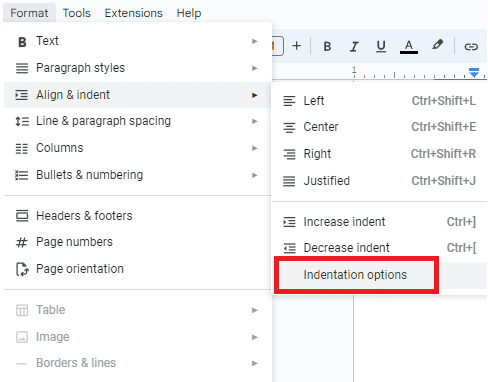
Method 3: Change Indentation Settings
Another way to stop words from going off the page in Google Docs is to reset your indentation settings:
- Select your text. To select the entire document, use the keyboard shortcut CTRL + A.
- Go to Format > Align & indent.

- Click on the Indentation options.
- Set the left and right indentation options to 0.
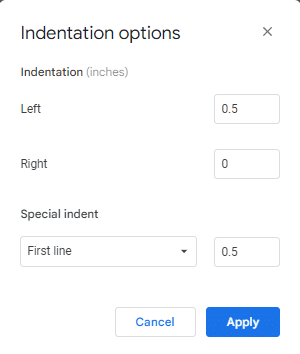
- For special indent, select None.
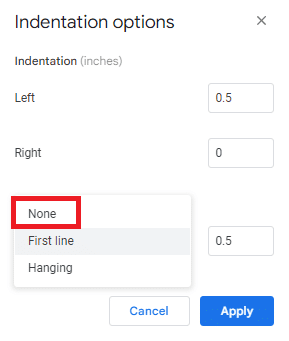
- Click Apply to reset your indentation and stop the text from going off the page.
Method 4: Clear Browser Cache
You may have too much data in your browser (in the form of caches), which can affect how your websites run. Clearing the data should help Google Docs run more smoothly and eliminate the problem of text going off the page in Docs.
To clear your cache:
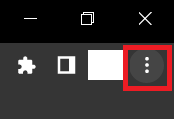
- Click on the vertical ellipses (⋮) in the top-right of your browser window.
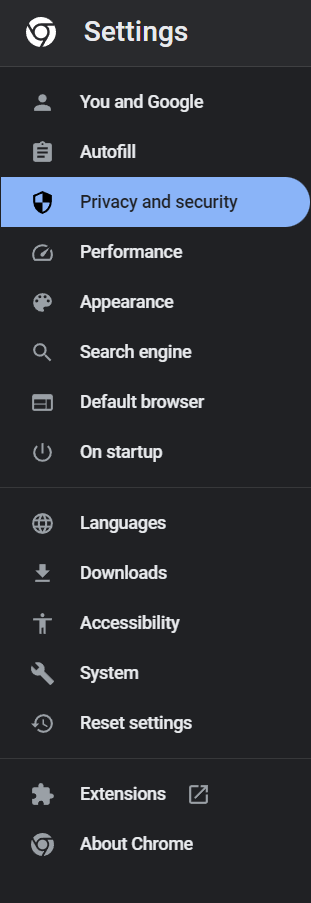
- Scroll down to Privacy and Security.
- Click on “Clear browsing data.”
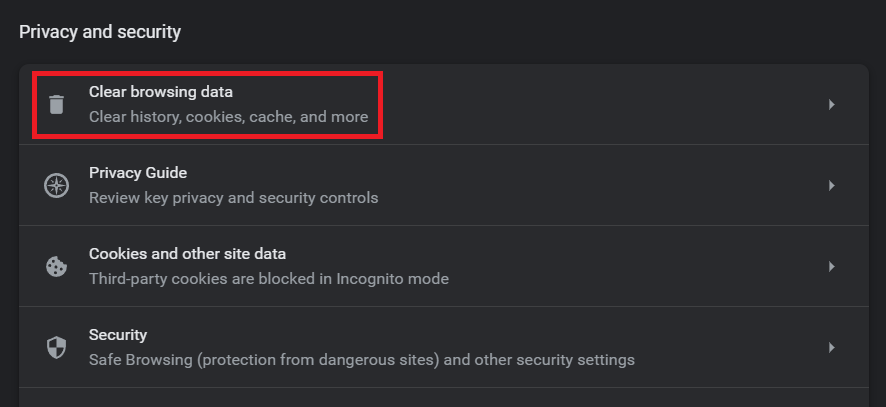
- Set the time range to “All time” and click “Clear Data.”

- Restart the browser and reopen the Google Docs page. You should be able to see whether your alignment has been fixed.
Method 5: Remove Faulty Extensions
Faulty extensions might cause compatibility issues, like text going off-page in Google Docs. The best way to solve this issue is by removing the extension.
- Go to the extension icon in your browser.
- Click on the vertical ellipses (⋮) next to the extension.

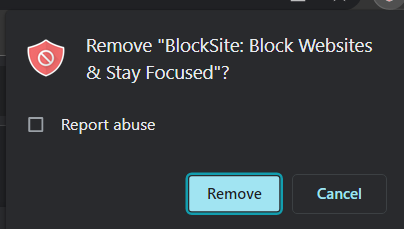
- Click “Remove from Chrome.”

- Click “Remove” in the prompt that appears.
- Reload the Google Doc page.
If the extension is the cause, this method should solve the problem. However, you may have multiple extensions and may struggle to find the culprit. In this case, you may want to reset your browser.
Luckily, this won’t delete your data in Chrome – but it will set most elements back to their default setting.
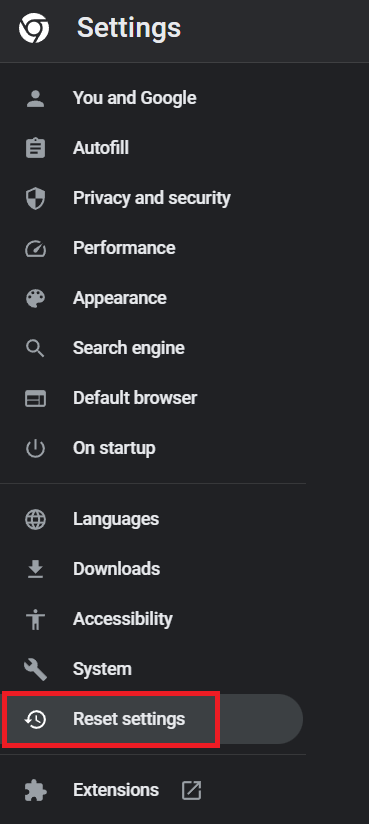
To Reset Your Chrome Browser
- Click on the vertical ellipses (⋮) in the top-right corner of your browser.
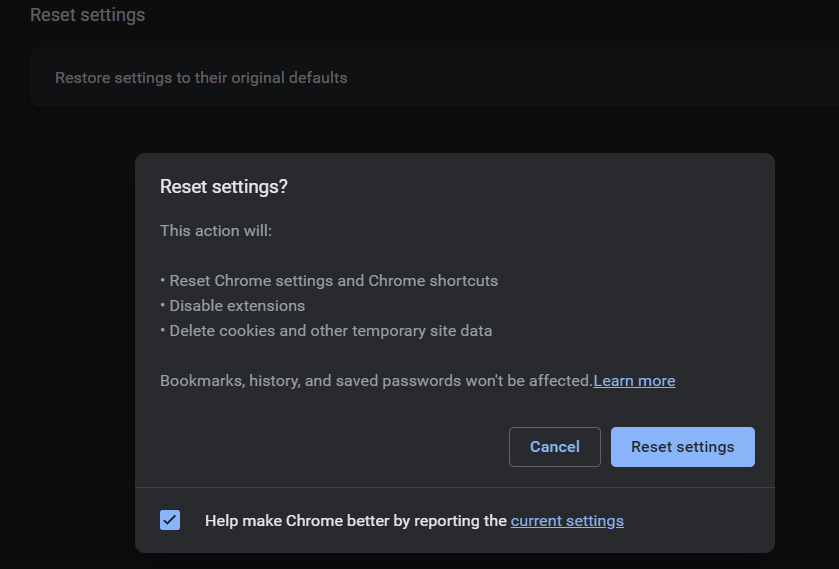
- Go to Reset settings.
- Click the option “Restore settings to their original defaults.”
- Click “Reset settings” to remove all the extensions, including the problematic ones.
Frequently Asked Questions
Why Is My Writing Going off the Page in Google Docs?
There are several reasons why your text may be going off the page in Google Docs, including narrow margin settings, indentation issues, rogue extensions, and too many cached elements.
Wrapping up
Google Docs words going off page is a frustrating problem, but at least five methods can help tackle the issue! By following one of these recommendations, I hope you can keep text within your preferred margins.
Get Premium TemplatesLooking for more ways to improve your Google Suite skills? Udemy offers hundreds of professional courses that are designed to build your knowledge and expertise – at a great price!
Related:
- Insert a Google Sheet Into Google Docs [Guide]
- How To Rearrange Pages In Google Docs
- How To Insert Page Breaks in Google Docs
- How to View Multiple Pages in Google Docs
