When working with text data in Google Sheets, sometimes you may have a need to change the rotation of the text.
In some cases, you may want to make it vertical.
For example, if you have merged cells in rows and you want to show the text in the merged column vertically. This can help save space, especially when you want to print the data.
In this tutorial, I will show you how to make the text vertical in Google Sheets and all the other options you have to rotate text in Google Sheets.
Table of Contents
Rotate Text Vertically in Google Sheets
When it comes to rotating the text vertical in Google Sheets, you have three options:
- Stack the text vertically
- Rotate up the text
- Rotate down the text
Let’s have a look at each of these options
Stack Vertically in Google Sheets
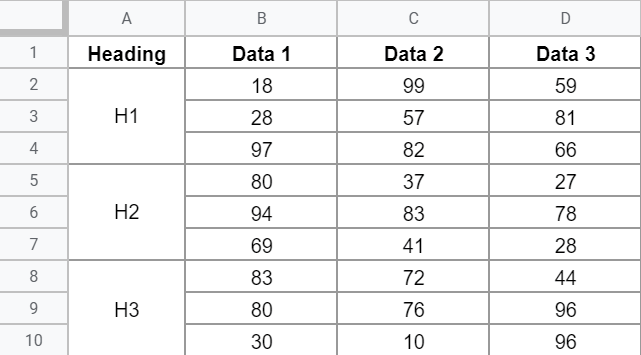
Suppose you have a data set as shown below and you want to stack the text vertically in the merged cells in column A.
Below are the steps to stack the text vertically:
- Select the cells where you want to make the vertical
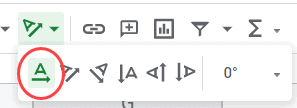
- In the toolbar, click on the text rotation icon

- Click on the ‘Stack vertically’ option

The above steps would stack your text vertically and give you the result as shown below.
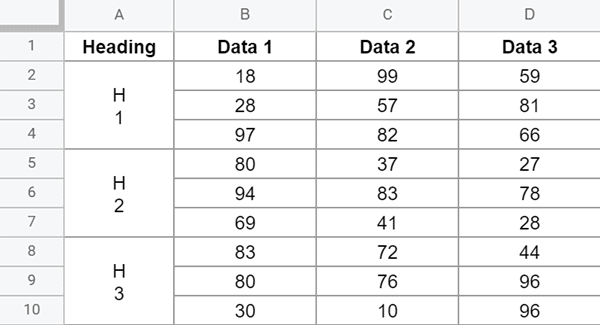
When you apply this formatting, the cell size would automatically adjust to accommodate the new vertical text (i.e., the cell height would be increased if needed)
Note that in this kind of vertical stacking, every alphabet is placed right below the above one. This is slightly different from the rotate up and rotate down vertical stacking that we will see later.
Personally, I rarely use this option. The only scenario where you will find this useful is when you have very little text in the cell (as I have in my example). In case you have proper words or strings and you want to rotate these, it’s best to use Rotate Up or Down option.
Rotate Up the Text
Some people may not like the vertical stacking option as it’s difficult to read the text in the cell.
In that case, you can try the Rotate Up option.
It works the same as vertical stacking, but instead of placing each alphabet below the above one, it simply rotates the text 90 degrees to make it vertical, where the text starts from the bottom and goes to the top.
Suppose you have a data set as shown below and you want to rotate the text vertically in the merged columns.
Below the steps to do this:
- Select the cells where you want to make the vertical
- In the toolbar, click on the text rotation icon
- Click on the Rotate Up option

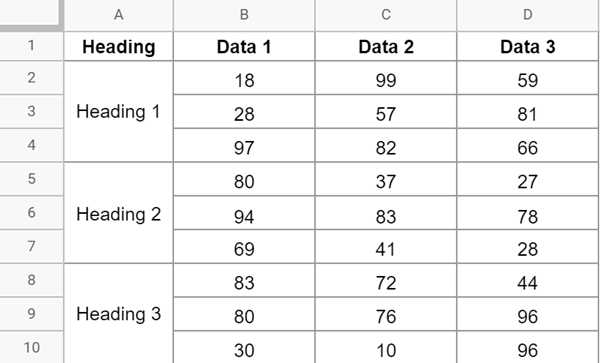
The above steps would rotate up the text vertically and give you the result as shown below.
As you might be able to figure out, applying this formatting has simply changed the rotation of the text by 90 degrees.
Personally, I find this a little more readable than the vertical stacking. So if you have more text, you can wrap the text and adjust the cell height so that you can get the text in one single cell, or you can get the text as multiple lines in the same cell.
Rotate Down the Text
Rotating down the text is similar to the rotate up option, where the direction changes (-90 degrees).
So instead of your text starting at the bottom and going at the top (which was the case in the rotate up option), your text would start at the top of the cell and go down vertically.
Suppose you have a data set as shown below and you want to rotate down the text vertically in the merged columns.
Below the steps to do this:
- Select the cells where you want to make the vertical
- In the toolbar, click on the text rotation icon
- Click on the Rotate Down option

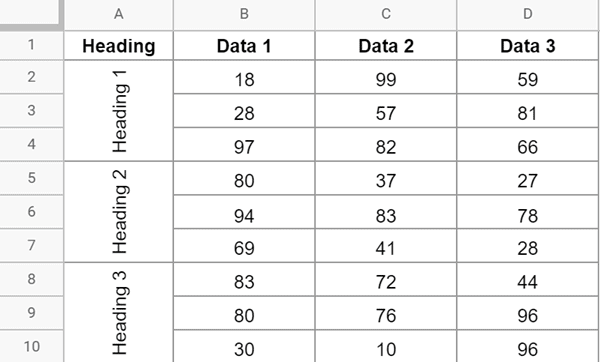
The above steps would rotate down the text vertically and give you the result as shown below.

Removing the Text Rotation (Getting Default Left to Right Text)
If you have already made the next vertical (or rotated to an angle), you can easily get the default left-right text with a single click.
To do this, go to the toolbar, pick the text rotation icon, and then click on none.
Doing this would remove all the rotation settings and give you the default one.
Apart from rotating the text vertically using the three options covered in this tutorial, you also have the option to tilt the text at a specific angle.
These are called the tilt up and tilt down options, and you can also specify the direction and the magnitude of the direction right in that toolbar by specifying the degrees.
This is quite useful when you want to save some space with column headers and tilt it to any angle instead of making it completely vertical.
So these are the options available to you when you want to make the text vertical in Google Sheets.
I hope you found this tutorial useful.